| Product(s): |
WaterGEMS, WaterCAD |
| Version(s): |
08.11.XX.XX and later |
| Area: |
Output and Reporting |
Problem
How do I create profiles and display different properties on them in WaterCAD or WaterGEMS?
Solution
1) To create a profile view, go to View > Profiles.
2) Click the New button and when the profile setup dialog box come up click the button that says "Select from Drawing" to choose the elements that will be in your profile.
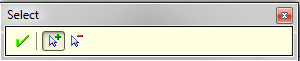
3) Use the arrow with the green plus sign (+) next to it in order to add items to the profile and use the arrow with the minus (-) sign next to it if you need to remove items from your selection. When you are done choosing the items for your profile click the green check mark button on the selection toolbar.
4) After you've chosen the element for your profile the profile setup window will appear with the a list of the elements you've choose. In this window you can reverse the order of the elements, remove all the elements and start over if you've made a mistake, remove all the previous elements from a choose point on the list, or remove all the elements following a chosen point on the list. After you've made whatever changes you may need to click the "Open Profile" button located at the bottom of the window.

5) The next window you will see is the Profile Series Options window where you choose what scenario or scenarios you would like to display a profile before on the left side and you choose the properties of each element you'd like to display on the right side (see area in red box below). You can display results for multiple scenarios in the same profile.
Note: if this does not appear automatically,

6) The last window you will see is the profile window. The y-axis of the graph displays the values of the properties that you chose from the profiles series options window while the distance between the graphed elements is displayed along the x-axis. If you'd like to know the exact value at a certain point you can click on the data tab at the top of the window to view the values (see red box in the screen shot below)

At this window you can always use the drop down arrow at the first icon on the top of window that looks like a chart to bring you back to the profile series options, so that you can add or remove some properties from your profile. You can also use the drop down arrow on the second icon from the right to change chart options such as color of lines, increment used on the axes, label of the property in the legend, style of the line displayed, etc....
Saving Profiles
Prior to the release of the CONNECT Edition products (10.00.XX.XX) profiles would save automatically once they were created.
Starting with the release of the CONNECT Edition products (10.00.XX.XX and later) profiles created with the context menu (right-click>Create Profile) are now temporary. When you close the profile viewer for a temporary profile, you are asked if you want to save it. When you select Yes to this prompt you will have the chance to enter a label for the profile.