| |
Applies To |
|
|
| |
Product(s): |
WaterGEMS, WaterCAD, HAMMER, SewerGEMS, SewerCAD, StormCAD, CivilStorm, PondPack |
|
| |
Version(s): |
08.11.XX.XX, 10.XX.XX.XX |
|
| |
Area: |
Layout and Data Input |
|
| |
Original Author: |
Craig Calvin, Bentley Technical Support Group |
|
Problem
How can I specify automatic numbering format for new elements as they are added to the network?
Solution
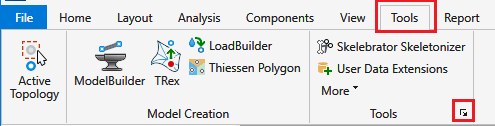
Go to, Tools > Options > Labeling tab
Note: in the CONNECT Edition, the Options dialog is here:
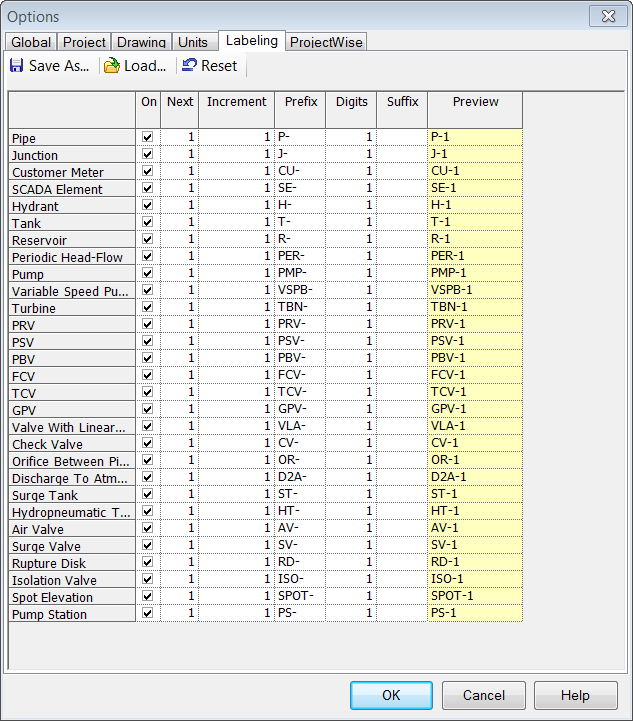
From here, you can set how new elements will be labeled for each element type.
Buttons
- Save As: Saves your element labeling settings to an element label project file, which is an. xml file.
- Load: Opens an existing element label project file.
- Reset: Resets the values in the 'Next' column to the values that are located in the 'Increment' column. The default value of the increment column is 1.
Labeling Table Columns
- Element: Shows the type of element to which the label applies.
- On: Turns automatic element labeling on and off for the associated element type.
- Next: Type the integer you want to use as the starting value for the ID number portion of the label. Bentley WaterGEMS V8i generates labels beginning with this number and chooses the first available unique label.
- Increment: Type the integer that is added to the ID number after each element is created to yield the number for the next element.
- Prefix: Type the letters or numbers that appear in front of the ID number for the elements in your network.
- Digits: Type the minimum number of digits that the ID number has. For instance, 1, 10, and 100 with a digit setting of two would be 01, 10, and 100.
- Suffix: Type the letters or numbers that appear after the ID number for the elements in your network.
- Preview: Displays what the label looks like based on the information you have entered in the previous fields.
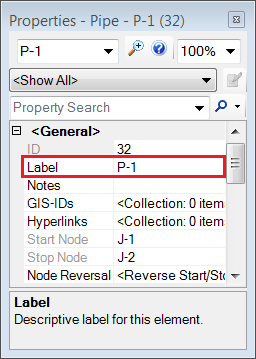
How to edit existing element labels
Elements that have already been placed can be edited in the "Label" field of the Properties grid for individual elements.
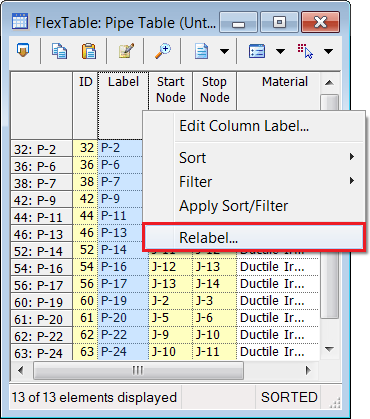
FlexTables can also be used to edit existing element labels and make it easier to edit multiple elements at a time.
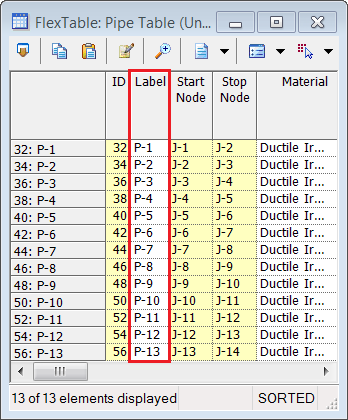
All elements in the FlexTable can be edited at the same time by right-clicking on the "Label" column heading, then clicking "Relabel…".
The following three types of relabeling operations can be performed:
Replace: This operation allows you to replace all instances of a character or series of characters in the selected element labels with another piece of text.
Example: P could be replaced with the word Pipe by entering P in the Find field, Pipe in the Replace With field, and clicking OK. P-1 would be replaced with Pipe-1 and so on.
Append: This operation allows you to append a prefix, suffix, or both to the selected element labels.
Example: Suppose that you have selected the labels 5, 10, 15, and 20, and you wish to signify that these elements are actually pipes in Zone 1 of your system. You can use the append operation to add an appropriate prefix and suffix, such as P and -Z1, by specifying these values in the Prefix and Suffix fields and clicking the Apply button. Performing this operation yields the labels P5-Z1, P10-Z1, P15-Z1 and P20-Z1.
Renumber: This operation allows you to generate a new label, including suffix, prefix, and ID number for each selected element.
Example: If you had the labels P-1, P-4, P-10, and Pipe-12, you could use this feature to renumber the elements in increments of five, starting at five, with a minimum number of two digits for the ID number field. You could specify a prefix P and a suffix -Z1 in the Prefix and Suffix fields, respectively. The prefix and suffix are appended to the front and back of the automatically generated ID number. The value of the new ID for the first element to be relabeled, 5, is entered in the Next field. The value by which the numeric base of each consecutive element is in increments, 5, is entered in the Increment field. The minimum number of digits in the ID number, 2, is entered in the Digits field. If the number of digits in the ID number is less than this value, zeros are placed in front of it. Click the Apply button to produce the following labels: P05-Z1, P10-Z1, P15-Z1, and P20-Z1.
Note:
- The entry fields displayed depend on what operation is selected.
- The Preview field displays an example of the new label using the currently-defined settings.
See Also
How do I append a prefix to element labels based on a selection set of elements?