| Product(s): |
SewerGEMS, SewerCAD, StormCAD, CivilStorm |
| Version(s): |
CONNECT Edition, V8i |
| Area: |
Layout and Data Input |
Problem
How can a user add catalog conduits to a model using ModelBuilder?
Solution
When creating conduits in the storm and sewer products, the user has the option to use a user-defined catalog or a conduit catalog. This can be defined manually or in a more automated fashion, such as through the global edit function in the conduit FlexTables or through ModelBuilder.
Adding user-defined conduits with ModelBuilder is relatively straightforward. A user will simply map the shape data, diameter data, and other properties from the source file to model file. The catalog conduit works in a similar manner, but requires some additional steps.
Currently, the program uses a reference number called a GUID to assign catalog conduit sizes. Each GUID is unique to a certain conduit size, shape, and material. Because the program uses this GUID to assign the size, it is needed when building catalog conduits in ModelBuilder. Below is the general process the user will take to create catalog conduits in a new or existing model.
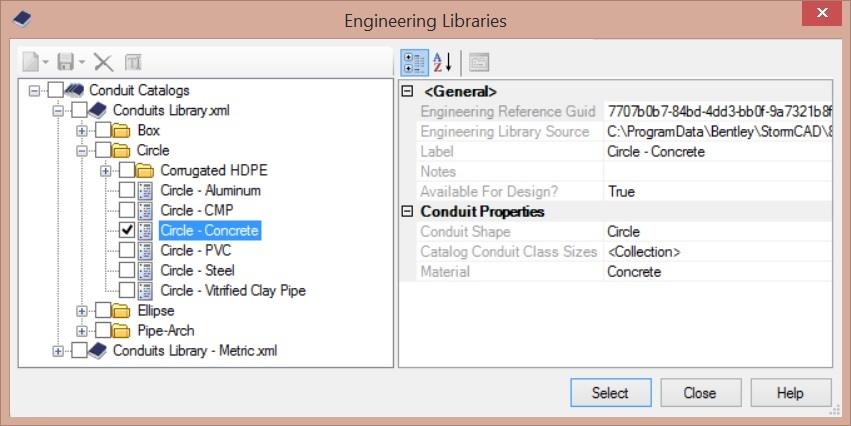
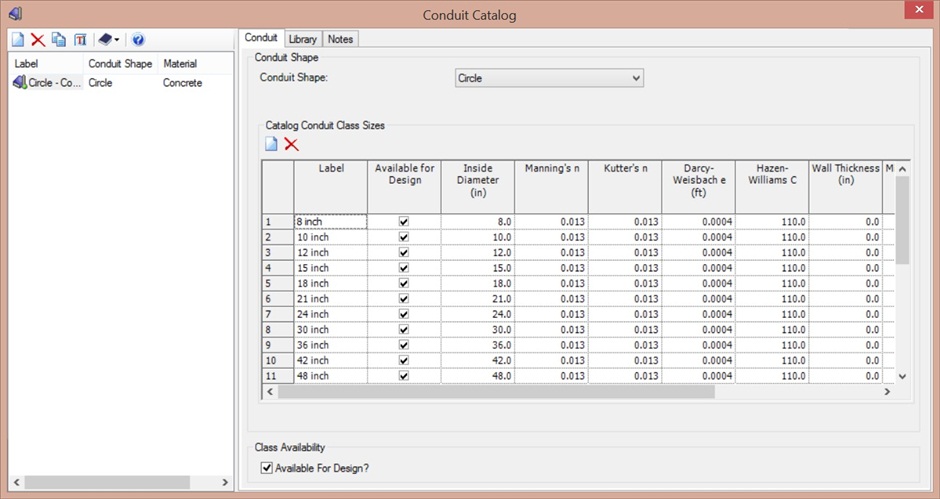
First, the user will need to get the GUID for their catalog conduit. This will use the "Sync Out" process in ModelBuilder. Open the product, then go to Components > Catalog Conduit. Add a new catalog conduit either manually or by importing it from the Engineering Library. If you are importing from the Engineering Library, select the Synchronization Options button, then Import from Library. Select the conduit shape and material you want to use and click the Select button to add this to the library.
Next, create an Excel spreadsheet and add columns for the label, size, and GUID. The exact setup of the spreadsheet will depend on the type of conduit it is. This support solution is using a circular conduit as an example, but the spreadsheet shown in the screenshot below could be used for other conduit shapes as well. Save the spreadsheet once the columns are added.

Now, open ModelBuilder and click the New button. Select Excel as the Data Source Type. Browse to the data source file and select it, then click Next. In the next screen, make sure your units are correct for your model, then click Next. Click Next two more times to get to the Field Mapping section.

The screenshot above shows the mapping for a circular conduit, but the general setup will be the same for any conduit shape. For the Table Type, use "Conduit Catalog, Catalog Conduit Class Size". The Key Field should be set to the label column. In the lower left part of the ModelBuilder dialog, you will define the field mapping. In this case, you would assign the diameter or size information and the GUID value. You do this by highlight an item in the Field column, then using the Property dropdown menu to choose an available property field. Once this is completed, click Next.
In the next screen, set "Would you like to build a model now?" to No and click Finish.

This will take you back the ModelBuilder manager. Highlight the ModelBuilder session you just created; it will be named after the Excel file you used. After highlighting the session, click the Sync Out button.

This will update the Excel file with data from the Conduit Catalog you are using. When it completes, the data will be in the spreadsheet, including the GUID.

Now that you have the GUID, you will need to add this field to your source file. The GUID should be a text field. If it is not assigned as a text field in the source file, it will not import correctly.
You should now be able to build the model as you normally would. Note that the GUID will need to be assigned to the conduit property "Size", not "Diameter". Size is the text field that uses the GUID. Diameter is a numerical field used for user-defined conduits.
See Also
Using ModelBuilder to Import External Data