| Product(s): |
WaterGEMS, WaterCAD |
| Version(s): |
10.XX.XX.XX, 08.11.05.XX+ |
| Area: |
Modeling |
Problem
How can I create custom alerts or user notifications?
Video
Solution
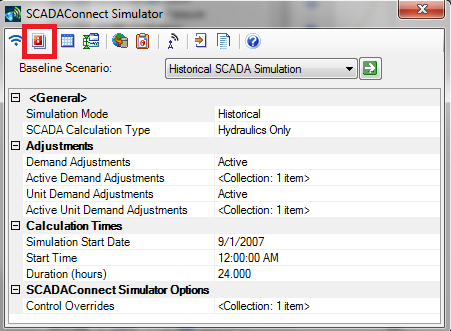
In WaterGEMS and WaterCAD, Alerts can be configured in the Alerts manager window, which can be accessed through the “Components” menu (Components > Alerts or as a button from the SCADA Connect Simulator manager.)
These alerts are settings the user can create that will trigger messages when a certain criterion value has been exceeded for any type of hydraulic modeling element. Alerts are calculated at the time the scenario is run, not when the alerts are entered
Note: In SewerGEMS, SewerCAD, StormCAD and CivilStorm, see Engineering Standards
The Alerts manager window:
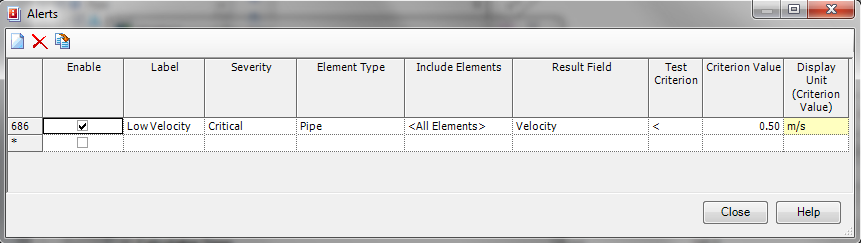
From the buttons at the top of the dialog, the user can create new alerts, delete existing alerts or duplicate an alert.
The button location for alerts on the SCADA Connect Simulator window:
Alerts can be used for various objectives such as letting the user know that junction elements that fall out of a given pressure range or finding a pressure pipe that is below or above a given velocity.
The steps for creating a new alert are as follows:

1) Click the new button highlighted by the red box in the screen shot above
2) Click the check box in the “Enable” field to enable/disable the alert for the run
3) Type in the name for this alert in the ‘Label’ field
4) Set the severity of the alert using the drop down menu to Critical (red), Warning (yellow), or Informational (blue).
5) The “Include Elements” column allows you to choose from a selection set of elements that you have already created or use the alert for <All Elements> in the current scenairo
6) “Result Field” defines the result property that you will be choosing to create the alert from. These properties vary depending on which element type that you choose.
7) The “Test Criterion” sets the operator that you are choosing for this alert. The operators are greater than (>), less than (<), not equal to (< >), equal to (=), greater than or equal to (> =), and less than or equal to (< =).
8) The “Criterion Value” field allows you to define the value your alert will be based on and the “Display Unit Criterion Value” field is a display field (read-only) that shows you the current units for the “Result Field” that you have selected. If you’d like to change this value you can do so using the instructions from this wiki article.
The alert messages can be found with the user notifications under Analysis > User Notifications by choosing the Alarms and Alerts tab.
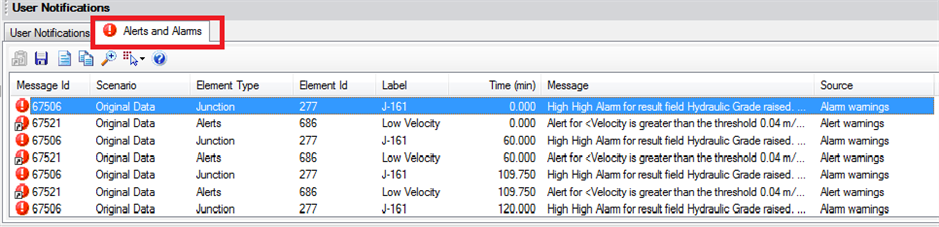
Most of the columns are self-explanatory and if you are familiar with the user notifications window this is designed the same way. The color of the message is an indication of its severity. Then you are given the Message Id followed by the name of the scenario, element type, element Id, element label, time the alert occurred, message details, and the source the alert was generated from.
When multiple elements trigger alerts, these can be viewed by picking the Details (first button on top of table) to view multiple alerts at a given time. The second button enables the user to save the alarms and alerts in a csv file. The third button generates a report that can be printed. The fourth button copies the highlighted alert (see the example below)
40020 "Base" "Tank" "456" "T2" 16.59 "Tank T2 low alarm level is violated." Calculation Warnings
The fifth button zooms to the element associated with the highlighted alert. The sixth button selects the highlighted element in the model for the alert you have highlighted and the final button opens the Help documentation.
See Also
Engineering Standards