| |
Applies To |
|
|
| |
Product(s): |
SewerGEMS, CivilStorm, StormCAD, SewerCAD, WaterGEMS, WaterCAD, HAMMER |
|
| |
Version(s): |
10.00.XX.XX |
|
| |
Original Author: |
Mark Pachlhofer, Bentley Technical Support Group |
|
Why use the Ribbon Interface?
The Ribbon is designed to help you quickly find the commands that you need to complete a task. Commands are organized in logical groups, which are collected together under tabs. Each tab relates to a type of activity, such as writing or laying out a page. To reduce clutter, some tabs are shown only when needed. For example, the Picture Tools tab is shown only when a picture is selected eliminating the need for numerous parallel toolbars. Contextual tabs are tabs that appear only when the user needs them. For instance, in a word processor, an image-related tab may appear when the user selects an image in a document, allowing the user to interact when an image is selected.
A ribbon is a command bar that organizes a program's features into a series of tabs at the top of a window. Using a ribbon increases discoverability of features and functions, enables quicker learning of the program as a whole, and makes users feel more in control of their experience with the program. A ribbon can replace both the traditional menu bar and toolbars.
Note: Enhancement 459373 has been filed requesting the capability to customize the Ribbon Interface.
* Microsoft Office Support, Retrieved September 1, 2016 from, https://support.office.com/en-us/article/Use-the-Ribbon-instead-of-toolbars-and-menus-d946b26e-0c8c-402d-a0f7-c6efa296b527
** Wikipedia, Retrieved September 1, 2016 from, https://en.wikipedia.org/wiki/Ribbon_(computing)
Learn the New Ribbon Interface
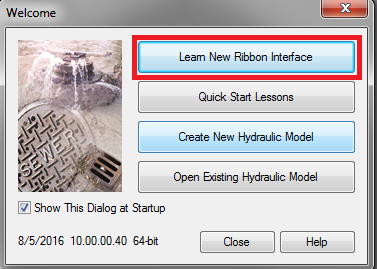
The new ribbon interface upgrade keeps users consistent with other software, such as Microsoft Office, which has used a ribbon for some time. Clicking the "Learn New Ribbon Interface" button open the help document titled "Ribbon Interface - Getting Started", which will introduce the user to the organization and layout of the new toolbars.

Search box
This is powerful tool if you know what command you are looking. Type in the name of the tool in the search box and a drop down list is populated that lists the command or that contains a word or letter that was input. This feature will help easy the transition to the new layout and help you find what you're looking for faster than scanning each toolbar or tab.

Frequently Asked Questions (FAQ's)
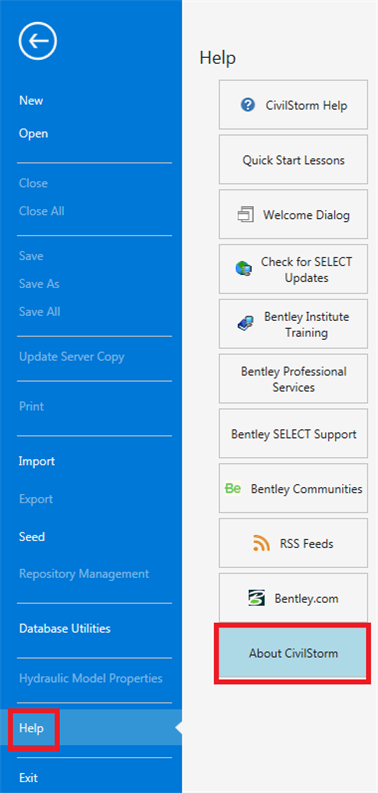
Where did the "Help" menu go? What happened to the "Help About" where you find the licensing information and version number?
The Help menu is now located on the File tab all the way at the bottom. 'Help About' is located off the help menu as seen in the screen shot below.

Where is "Options" that used to be located under the Tools menu?
Options is now a square icon still located on the Tools tab (menu), but in the lower right hand corner.
Where are the zoom tool buttons located?
The zoom tools are located to the right of the scenario drop down on the quick access toolbar. By default the toolbar is located above the drawing pane.
Why aren't the toolbars dockable?
In order to keep with the ribbon design concept all the toolbars are now in a fixed position. This should help encourage discoverability of new features and make learning the user interface easier. Please see the information above about why the ribbon toolbar concept was chosen. If you are having trouble finding a tool try to use the search box located at the upper right on the programs window.
What is the fastest way to layout new elements using the layout toolbar?
Select the conduit layout icon and move your cursor to the drawing pane. Right click in the drawing pane to gain access to all the layout tools. Please see the video below for a demonstration.
Cloud Services
The cloud services tab allows a user to associate a model to a project. Read more about cloud services by clicking here.

Minimizing and restoring the Ribbon (auto-hide)
The upward-pointing arrow button on the top-right corner (indicated by the red box below) will minimize the ribbon to just display the Main toolbar commands (File, Home, Layout, Analysis, Components, View, Tools, Report, Bentley Cloud Services). The ribbon bar will then only display as a fly-out when selecting the menus.
You can restore the ribbon by clicking it again (clicking the downward-pointing arrow on the right side).
Before:

After:

Customizable quick access toolbar
This toolbar can be docked either above the ribbon or below the ribbon and allows the user to choose from commands they use most often like Save, Save As, Find, Undo, Redo, Open a project, Create a new project, etc…

Home Tab
Storm and Sewer products
The home tab contains icons the Analysis menu used to contain Scenarios , Alternatives, Calculation Options, compute button , time browser, user notifications, validate, calculation summary, in addition to the layout button, selection tool, storm data, refresh element symbology, loading, RTK tables, pump definitions, graphs, profiles, flextables, selection sets, properties, active topology, ModelBuilder, etc…

Water products
The home tab contains icons the Analysis menu used to contain Scenarios , Alternatives, Calculation Options, compute button , time browser, alerts, user notifications, validate, calculation summary, in addition to the layout button, selection tool, storm data, loading, Demand Contorl Center, Unit Demand Control Center, pump definitions, graphs, profiles, flextables, selection sets, refresh element symbology, properties, active topology, ModelBuilder, etc…

The File Tab
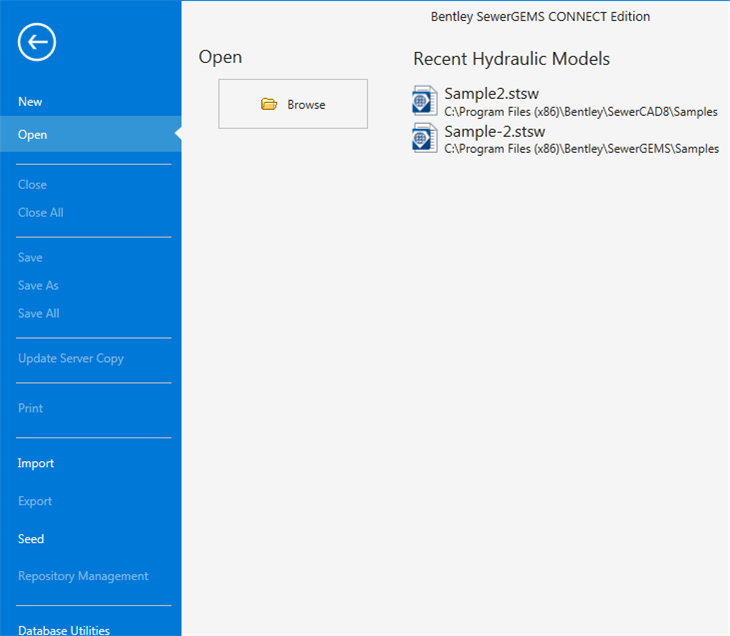
Here you find the New button, Open, Close, Close All, Save, Save As Import, Export, Update Server Copy, Print, Recent Projects, Seed File, Repository Management, Database Utilities, etc… The large arrow in the upper left hand corner brings the user back to the home tab

Layout tab
Storm and Sewer products
Contains the link, node, runoff and pond, and pressure elements used for constructing your model. It also contains the SCADA element, Drawing tool, a shortcut to the properties grid, and prototype window.

Water products
Contains the pipe, nodes (junction, tank, reservoir, pump, tap, VSP, valves of various types, etc…), transient elements, the SCADA element, Drawing tool, a shortcut to the properties grid, and prototype window.

The Analysis tab
Storm and Sewer products
Allows for access to all the tools that you need to examine the results in the model, compute the model, setup the scenarios for your model. This includes the scenarios , alternatives, calculation options, compute button, user notifications, time browser , graphs, design constraints, profiles, flextables, properties grid, queries, selection sets, network navigator, contours, SCADA Connect, etc…

Water products
Allows for access to all the tools that you need to examine the results in the model, compute the model, setup the scenarios for your model. This includes the scenarios, alternatives, calculation options, compute button, user notifications, time browser, graphs, design constraints, profiles, flextables, properties grid, queries, selection sets, network navigator, contours, SCADA Connect, etc…

Components tab
Storm and Sewer products
Storm Data, Loading , Extreme flows, Runoff, Pump Definitions, patterns, controls, engineering catalog, prototypes, storm water controls, minor losses, SWMM extensions, time series field data.

Water products
Demand Control Center , Unit Demand Control Center, Patterns, Pump Definitions, Controls, Zones, Engineering libraries, prototypes, Water Quality, Constituents, Multi Species Analysis , Minor Losses, GPV Headloss Curves, Pressure Dependent Demand Functions, Unit Demands, Valve Characteristics, Air Flow Curves, and Time Series Field Data.

View tab
Storm and Sewer products
The view toolbar contains the zoom tools, named view, aerial view, graphs, profiles , flextables, selection sets, queries, network navigator, quick graphs, properties, prototypes, contours, and terrain model tools.

Water products
The view toolbar contains the zoom tools, named view, aerial view, graphs, profiles , flextables, selection sets, element symbology, queries, element symbology, backgrounds, refresh drawing , customer data, network navigator, quick graphs, reset work space, properties, network navigator, prototypes, contours, and terrain model tools.

Tools tab
Storm and Sewer products
The tools tab contains the active topology, ModelBuilder, TRex, Loadbuilder, Thiessan Polygon, PondMaker, Element Property Inferencing, Update Conduit Descriptions, User Data Extensions, Batch Pipe Split, Scenario Comparison, Hyperlinks, etc…

Water products
The tools tab contains the active topology, ModelBuilder, TRex, Loadbuilder, Thiessan Polygon, Skelebrator Skeletonizer, Batch Pipe Split, Batch Morph, Assign taps to links, Assign isolation valves to pipes, Element Property Inferencing, User Data Extensions, Scenario Comparison, Hyperlinks, etc…
Report tab
Storm and Sewer products
Create custom reports, open flextables for elements, scenario summary, hydraulic model inventory, conduit, and pressure pipe inventory.

Water products
Create custom reports, open flextables for elements, flextables for transient elements, scenario summary, hydraulic model inventory, and pressure pipe inventory.

Scenarios drop down list
The scenarios drop down list is located on the upper left hand side of the display pane underneath the name of the files.

Quick access scenarios, select, pan, and zoom tools
Next to the scenarios drop down list are quick access icons for the scenario manager, pointer tool, pan tool, and all the zoom tools.

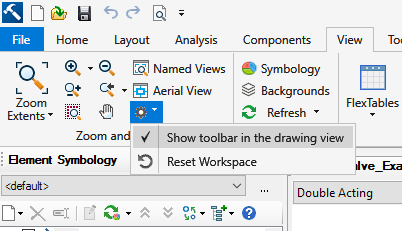
NOTE: if either the Scenarios or quick access, select, pan and zoom tools bar do not appear per above, the "Show toolbar in the drawing view" may be unchecked. This is located within the gear icon in the View tab of the Ribbon:

Options button
The options button opens the options dialog box shown in the screen shot below. 
Options Dialog
This dialog box contains 6 tabs. The global tab (displayed in the above picture) that has General settings, such as show status pane, zoom extents on open, number of backup levels, etc… The Window Color settings, and the layout settings, such as, auto refresh, display inactive topology, sticky tool palette, etc…

Menus in AutoCAD and the Menus in Standalone
The menus in standalone and the menus in AutoCAD are now designed the same way making interoperability and learning the interface easier.

See Also
What's New in SewerGEMS CONNECT Edition
What's New in WaterGEMS and WaterCAD CONNECT Edition
What's New in HAMMER CONNECT Edition
How to dock and auto-hide dialogs