| Product(s): |
WaterCAD, WaterGEMS, HAMMER, PondPack, CivilStorm, SewerGEMS, StormCAD, SewerCAD |
| Version(s): |
CONNECT Edition, V8i |
| Area: |
Output and Reporting |
Overview
This Tech-note explains how to adjust your layout in order to achieve the best results for a Fit-To-Page printout/plot in the standalone platform of OpenFlows (WaterGEMS, SewerGEMS, etc).
Background
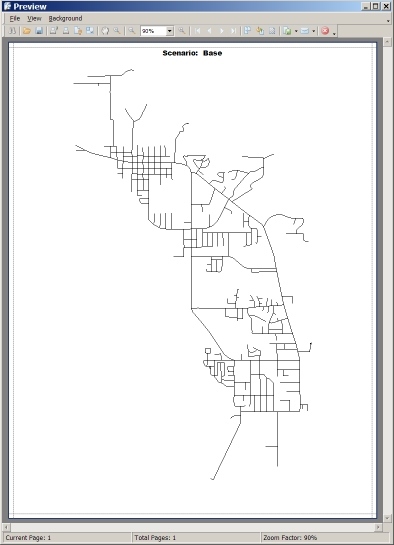
Sometimes you may want the plan view of the model network to be fit to one single page when printing. The "Fit to Page" option under File > Print Preview or File > Print will do this, but can sometimes cause unexpected results. For example, consider the following network layout and corresponding fit-to-page print preview:
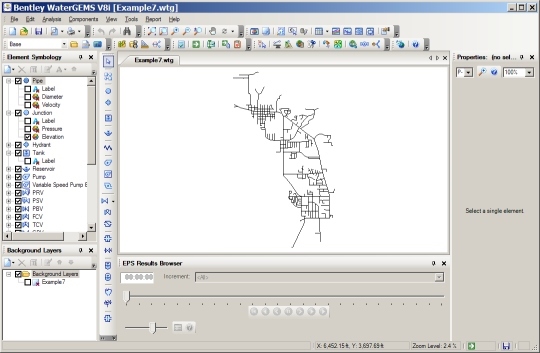
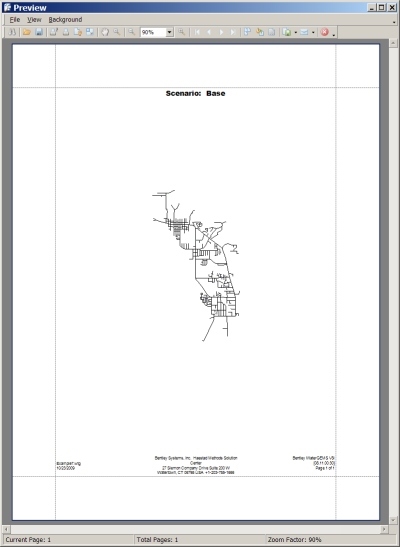
Notice that the network is small and doesn't take up the whole page. Extra blank space is left on all 4 sides of the model.
What Causes The Extra Space?
The extra blank space on the sides of the network in a fit-to-page printout or print preview is caused by two main factors:
1. The entire contents of the drawing pane will be fit to the page. Basically, a "what you see is what you get" approach is taken. In the above example case, notice how the drawing pane (the area where the model is displayed) has a lot of extra white/blank space on the left and right of the network. This is because the shape of the network is much different from the shape of the drawing pane. The model network is tall, but the drawing pane is wide, due in part to the monitor resolution and location of docked windows (the EPS results browser takes up a lot of space at the bottom.)
The below screenshot shows a similar case. Although the drawing pane appears to match the shape of the model, the same problem will occur, because the surrounding windows are not docked. Therefore, the drawing pane actually extends to both sides of the entire WaterGEMS window, behind those 'floating' managers. The red box indicates the true size of the drawing pane, all of which will be fit to the page when printing:

2. The aspect ratio of the drawing does not change. Basically WaterGEMS will not stretch the model vertically or horizontally to get a better fit - it is scaled up at the same ratio. So, when using zoom extents, the model network 'bumps' into the top and bottom before it can fill the space on the sides. This is basically as far in as the model can zoom while still being able to see the entire extents.
However, even if the model shape closely matches the drawing pane shape (leaving no extra space space on the sides), it may differ from the shape of the paper you need to print it on. So, extra space may still show up in the print preview if the paper size is not in agreement with the drawing pane size.
How do I Fix it?
The first thing you will need to do is get your drawing pane shape to match the model shape as closely as possible. This can be done by docking and resizing windows on the sides, bottom, and/or top of the model. Using the example case from the first screenshot in this technote, you could close the EPS results browser at the bottom to make the drawing pane extents taller. You could also dock windows on the left and right sides of the drawing pane, then click and drag the inside edges of those docked windows inward to make the drawing pane size taller.
Now, when you use the fit-to-page print preview, the OpenFlows product will no longer be trying to fit extra white space from the drawing pane. So, it will be able to scale the model up more before hitting the sides of the sheet. Therefore, the model will appear larger and more like you might expect:

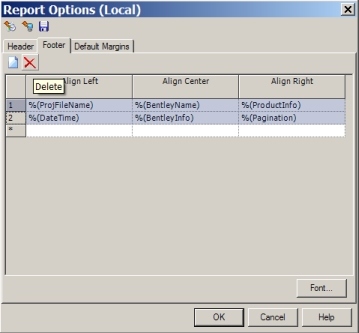
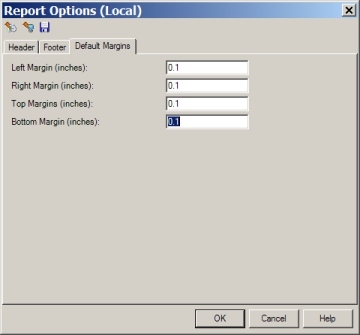
In some cases you may still noticed extra white space at the bottom of the printout (this can be more obvious with Landscape orientation). To get the model to appear even larger, you can remove items from the header/footer and reduce margin size, under the Report menu > Report Options:
Note that even with this optimized layout, a small amount of extra white space is seen in the print preview, on the left and right side of the model. This is because the paper size is slightly wider than the drawing pane. The OpenFlows product will not stretch the model horizontally to fill both sides, since the aspect ratio is maintained. Basically as the model is scaled up to fit the page, it's 'bumping' into the top and bottom before it hits the sides. Logically, the only way to fix this would be to choose a different paper size.
In general, the other option you have is to take advantage of one of the other platforms. For example with WaterGEMS, in addition to using the standalone user interface, you can work inside a compatible version of AutoCAD, Microstation, or ArcGIS. When integrated with any of those three applications, you can take advantage of their enhanced printing/plotting capabilities to get the printout you desire.
Profiles
If you are experience extra white space included in printouts of a profile in the storm or sewer products, see the below article:
Extra white space when printing profiles
See Also
Product TechNotes and FAQs
OpenFlows Product Tech Notes And FAQs