| Product(s): |
SewerGEMS, CivilStorm, StormCAD, WaterCAD, SewerCAD, WaterGEMS, HAMMER |
| Version(s): |
CONNECT Edition, V8i |
| Area: |
Layout & Data Input |
Problem
How do I see GIS-ID’s of elements, without having to click in the collection field?
Background
GIS-ID’s are populated, in the collection field in the properties of the elements. This technote will explain how you can see the actual GIS ID rather than "Collection - 1 item", in the flex tables or in the property window. Also, you can create annotations of the GIS-ID, for each element.
Solution
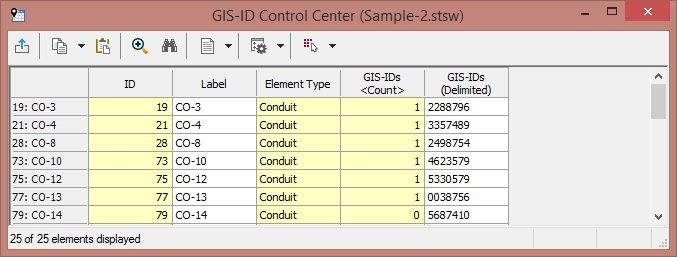
GIS-ID Control Center
Starting with the CONNECT Edition Update 1 releases of the water and storm-sewer products, a GIS-ID Control Center is included.
All elements in the model are available in the table. The GIS-ID column is a comma delimited field, meaning that multiple GIS-IDs can be entered and viewed here, separated with a comma. ModelBuilder can be used to import the data, which will then appear in the GIS-ID Control Center. If you edit the GIS-ID collection field in the element properties or element FlexTable, the data you enter there will also appear in the GIS-ID Control Center. To view the GIS-ID Control Center, go to Tools > GIS-ID Center > GIS-ID Control Center.
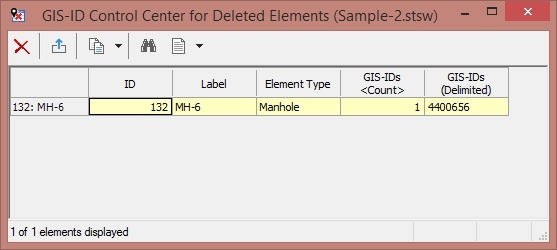
If an element is deleted from the model and it had a GIS-ID associated with it, you are still able to track these elements and their GIS-IDs. A separate GIS-ID Control Center for Deleted Elements has also been included. This will allow you to track the GIS-IDs used in a given model, even for elements no longer present. To view this, go to Tools > GIS-ID Center > GIS-ID Control Center for Deleted Elements.
ModelBuilder method
Note that the steps below will only work if you still have a one-to-one mapping between the element labels and their GIS-ID. If you have since made modifications to the model such as splitting or merging elements, the process will no longer work. Furthermore if the GIS-IDs change at a later point, the imported "notes" will not dynamically update.
One method to do this is to re-import the GIS-IDs from your source file, into another field such as "Notes", or a user data extension.
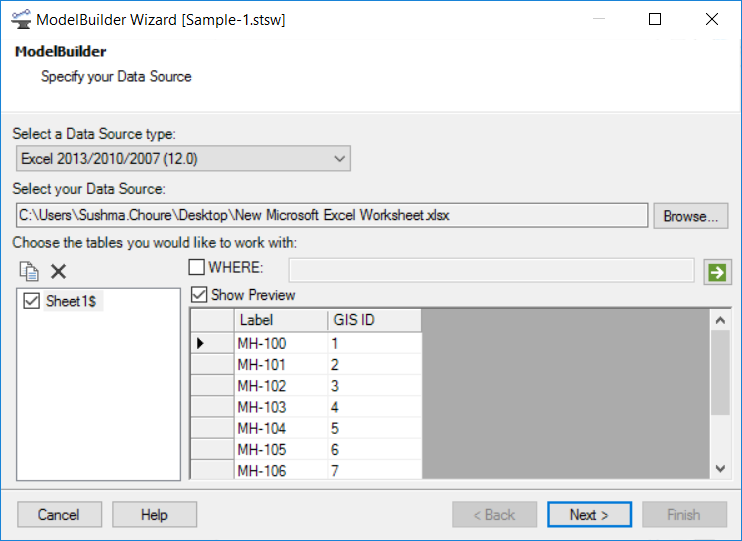
- Start Modelbuilder, choose your source type (Excel is used in this example) and select the file. Only check the worksheet containing the data.
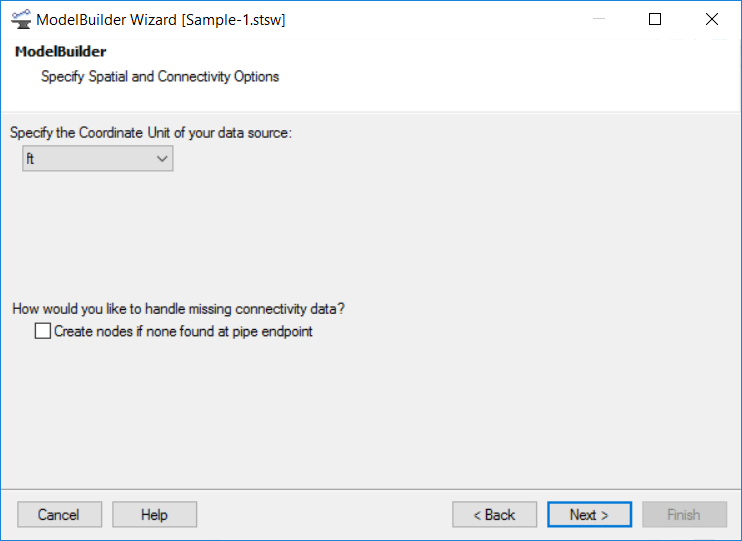
- Click next. No need to create nodes since we’re updating:
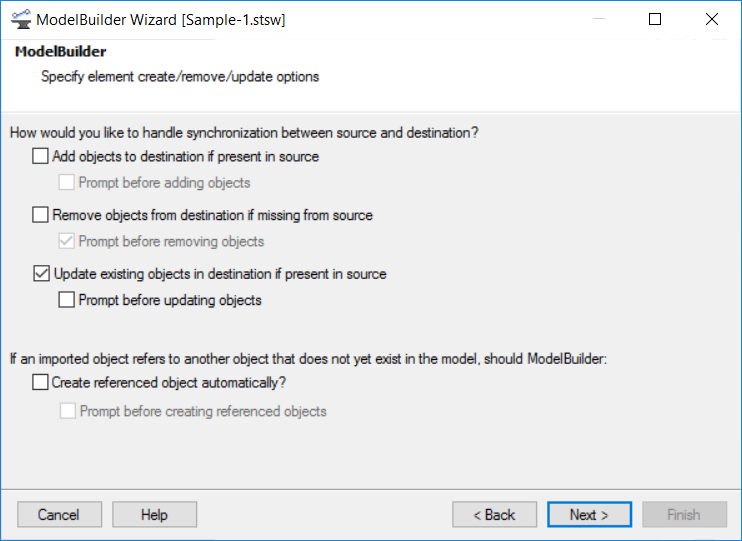
- Click next. We only need to update existing objects:
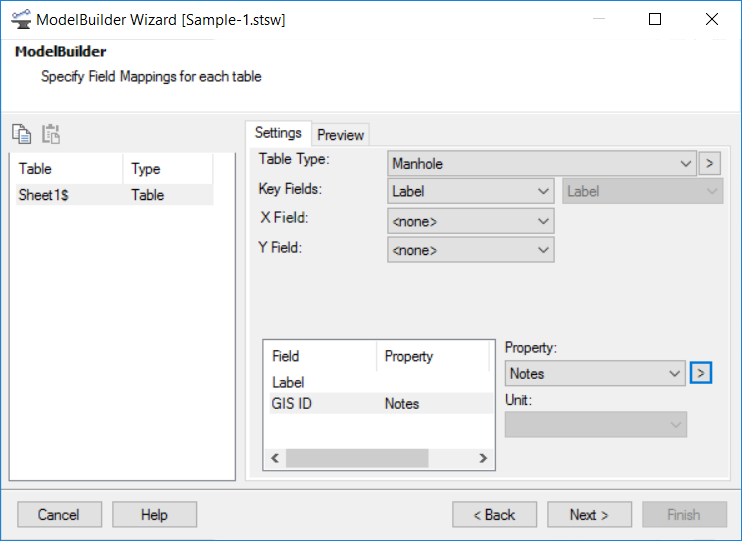
- Click next. This step is important. The “table type” needs to be set to “Manhole”. The key field is the field in the spreadsheet with the SewerGEMS labels. Map notes at the bottom to the GIS-ID field in your spreadsheet. Alternatively if you have information in the Notes field or if you want to store it separately, create a User Data Extension (UDX) first (you can advance to the end of the ModelBuilder run and choose "no" when prompted if you would like to build the model, create the UDX, then reopen the existing Modelbuilder run)
- Click next, then finish.

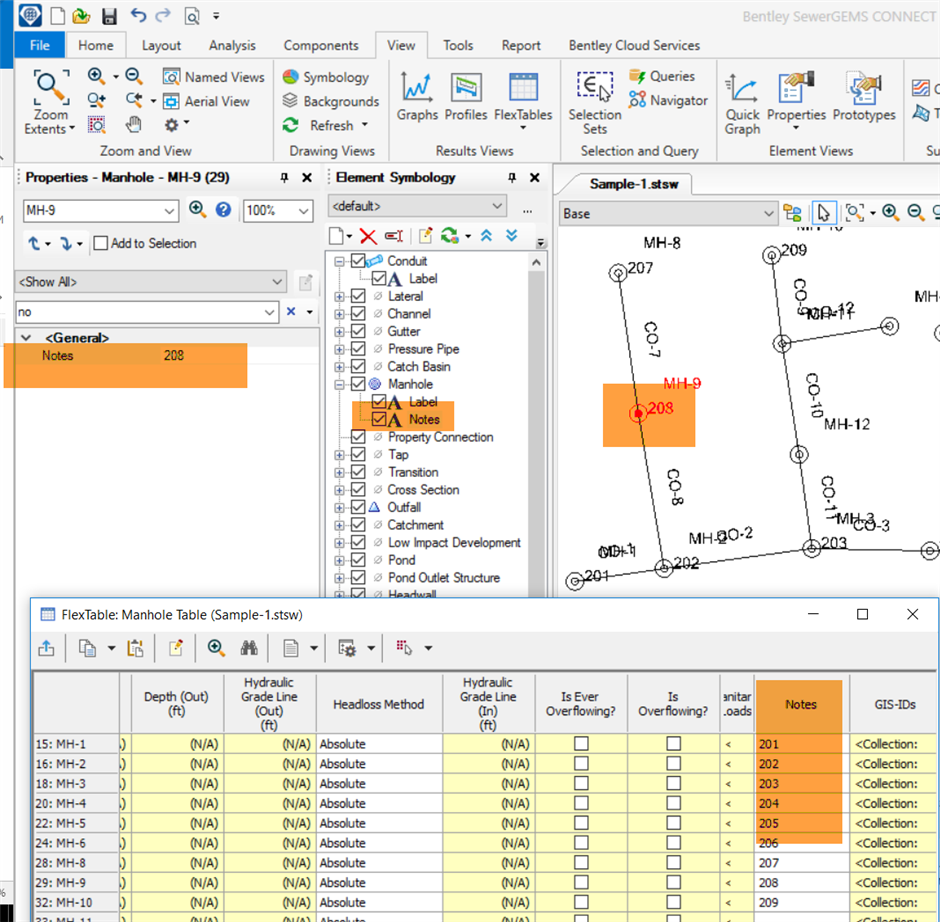
You can now see GIS ID’s in the notes field individually, which you can annotate for each element or add in the flex table.
Spreadsheet method
Another option is to set up a Modelbuilder connection to a new Spreadsheet with columns for label and GIS-ID and one tab for each element type. Map to the respective GIS-IDs collection table type in the Field Mapping step (for example "Pipe, GIS-IDs". At the end of the Modelbuilder process, choose "no" when prompted if you would like to build the model. Then, back in the main Modelbuilder manager, select the entry you just configured and click the "Sync out" button.
See Also
http://communities.bentley.com/products/hydraulics___hydrology/w/hydraulics_and_hydrology__wiki/11922.how-to-populate-an-existing-model-with-gis-ids