| Product(s): |
WaterGEMS, WaterCAD, HAMMER |
| Version(s): |
CONNECT Edition, V8i |
| Area: |
Layout and Data Input |
Problem
How do I select isolation valves which are linked to a set of selected pipes?
Solution
Isolation valves are attached to a pipe by means of a link. In the isolation valve properties there is a field "Referenced Pipe" which shows the pipe to which the isolation valve is linked. Currently, there is no direct way to get the information on assigned isolation valves by querying pipes in the model. An enhancement for this (# 979005) has been filed to include this feature in the Network Navigator to locate / select isolation valves assigned to a set of selected pipes.
To select isolation valves linked / associated to selected pipes, the following options are available;
Option 1
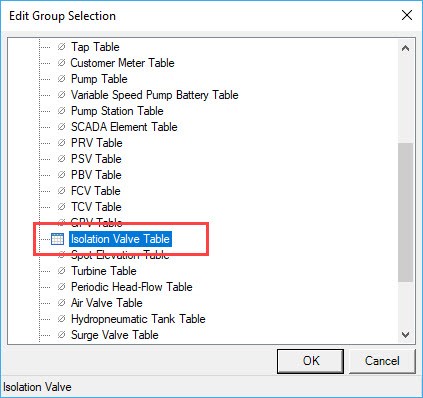
Directly select all elements from the area where your set of pipes exist in layout. Right click and choose "Edit Group". Select the "Isolation Valve Table". This will open a flex table containing isolation valves associated to your selected pipes. You can create a selection set of these isolation valves by clicking "Options" at the top and then "Create Selection Set".

Additionally if you have pipes grouped as per zones, and wish to locate / select isolation valves assigned to pipes having a common "zone"; you can select "Active Topology" in the Home tab (or under the Tools tab) and choose elements by query.
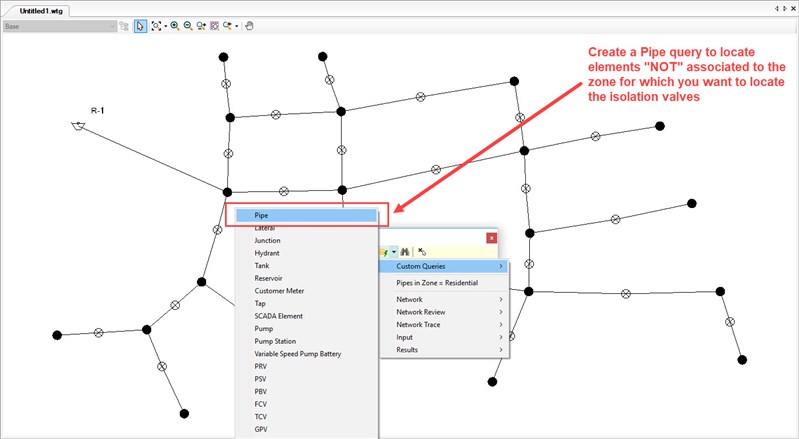
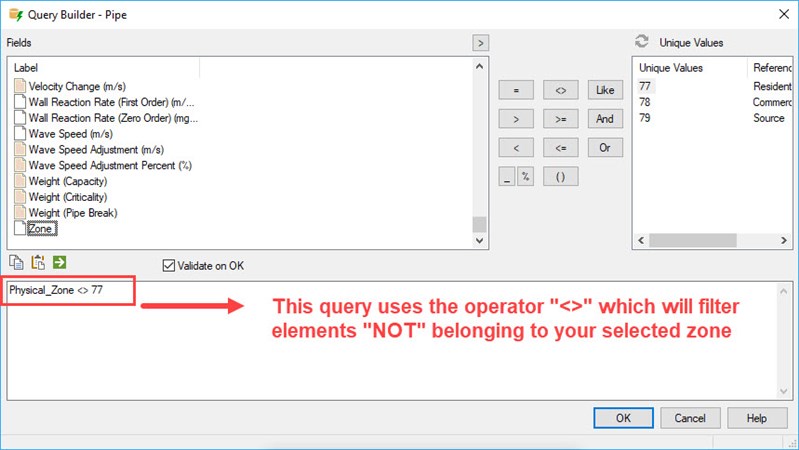
Create a custom pipe query, which selects elements "NOT" belonging to your selected zone. Once all the elements "NOT" belonging to the preferred zone are made inactive, you can simply select the elements and locate the isolation valves associated with the selected pipes as described above.
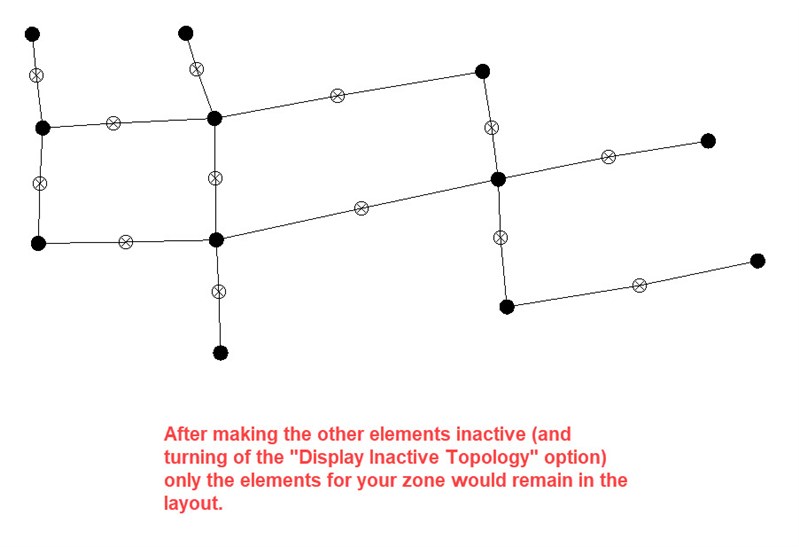
Note: The above method will work effectively, if the "Display Inactive Topology" under Options (Tools > More > Options) is kept unchecked. This will allow ease of selection of elements in case of extensive networks.
Option 2
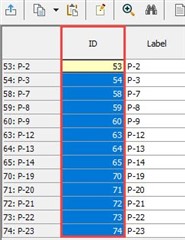
Select the pipes of your choice in the layout. Open the pipe flex table for these pipes (Right click > Edit Group > Pipe Table). Select the "ID" column (Right click > Select Column). Copy and Paste this selection into a spreadsheet (like Excel).
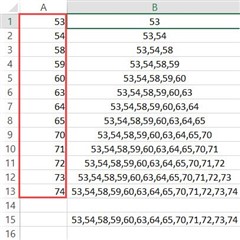
In Excel use this formula for the cell next to the first value (=A1). Below this use this formula (=B1&","&A2). Drag this formula till the last value. Now copy the content in the last value and paste it "values only" in some row below. Copy this content.
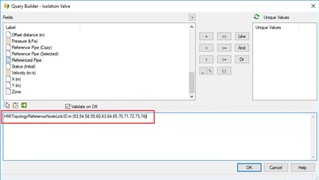
Now, open the Isolation Valve flex table. In this filter the "Reference Link" column with this query : HMITopologyReferenceNodeLinkID in (>>Pipe ID's of your pipes<<) After filtering, go to "Select in Drawing", Right click > Create Selection Set. A new selection set will be created for the associated isolation valves.
Option 3
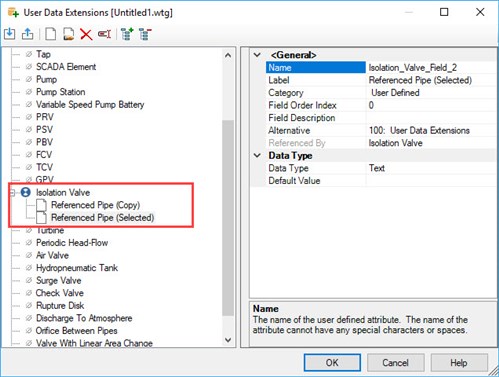
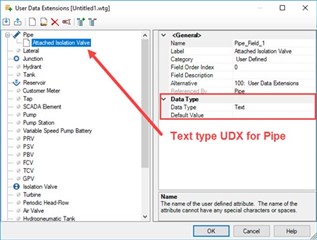
Create two, "Text" based UDX fields for isolation valves, "Referenced Pipe (Copy)" and "Referenced Pipe (Selection)".
Open the unfiltered isolation valve table and copy the "referenced pipe" data to the "Referenced Pipe (Copy)" field. This is done by right clicking the first column choosing "Select Column", then the "Copy" button at the top, then right click the second column, choose "Select Column", then click the "Paste" button at the top. Filter the pipe table on selection (using your desired selection of pipes). Copy and Paste the labels from the pipe table to Excel (or use the CSV export option, then open the CSV file and save to XLS format).
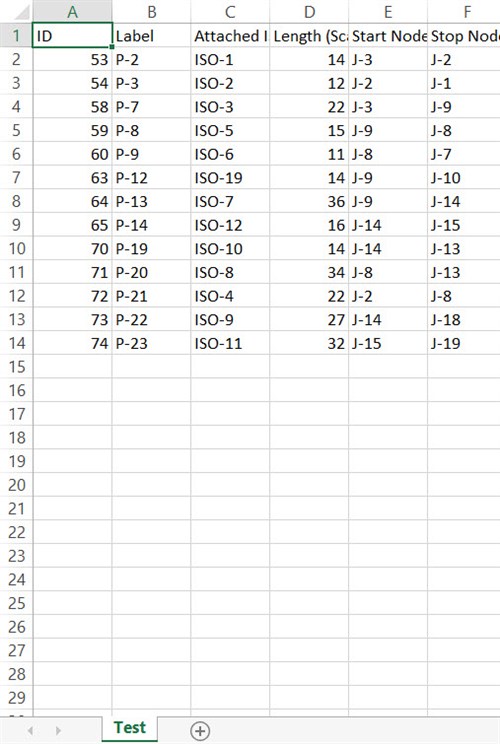
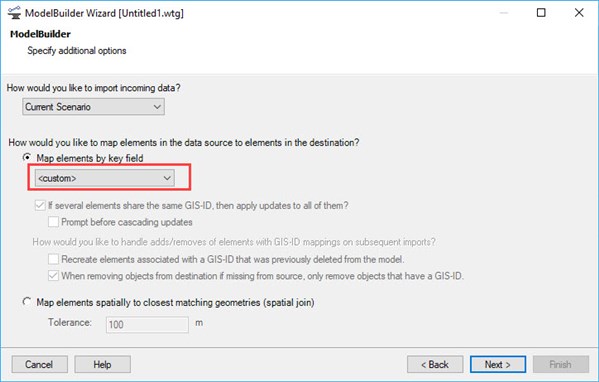
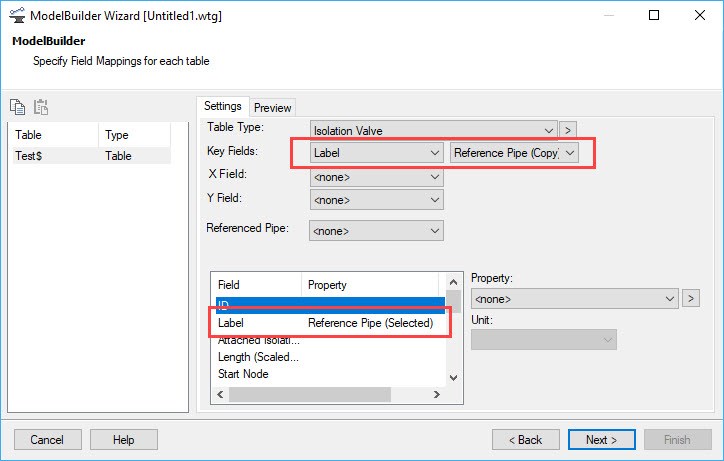
Create a connection to the Excel file in ModelBuilder, using the isolation valve table type. Choose the "custom" option for the "Map elements by key field" in the "Specify additional options" step; then for the key field, map the Excel file's label field to the model's "Referenced Pipe (copy)" field. In the bottom portion, map "Label" to the "Referenced Pipe (selection)" field. This will update the isolation valve UDX with the label of the pipes that were in your pipe selection set.
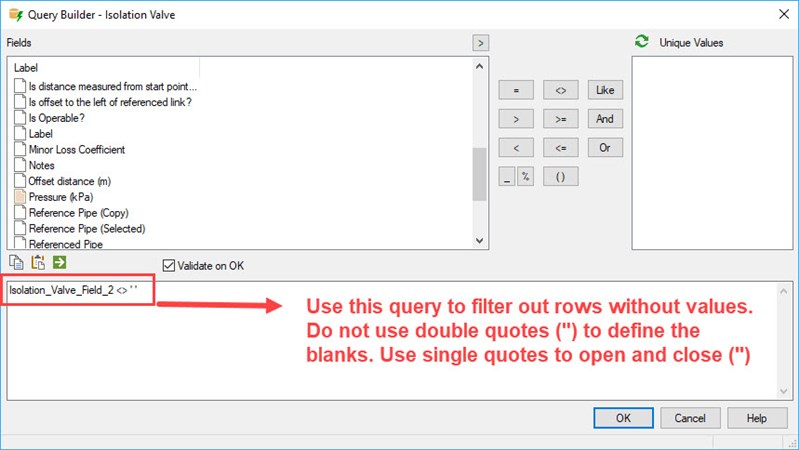
Create a new query for isolation valves to select only the ones that are not blank. Double click "Referenced Pipe (selection)", then type in <> ''. It should look something like this: Isolation_Valve_Field_2 <> ''. Run the query and it will select the isolation valves associated with your set of pipes.
Option 4
Create a "Text" based User Defined Extension for the pipe element to capture information on attached isolation valves. You can name the UDX as per your choice (E.g. "Attached Isolation Valve").
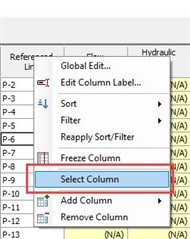
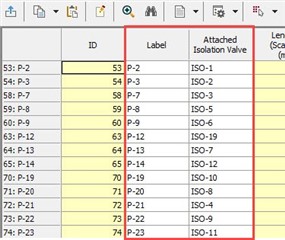
In the isolation valve flex table look for the property column "Referenced Link". Sort this column in ascending order (Right click > Sort Ascending). Now, copy all the isolation valves corresponding to these pipes from the "Label" column (Right click > Select Column > Copy). Paste this column to a spreadsheet application (like MS Excel). Now open the pipe flex table. Bring in the newly created UDX, "Attached Isolation Valve" by adding the property as a column. Sort the "Label" column in an ascending fashion. Copy and paste the column of isolation valve labels from the spreadsheet. Close the pipe flex table.
In the layout create a selection set of pipes for which you wish to locate the attached isolation valves. By double clicking the selection set, the elements in it will be selected in drawing. Right click and Edit Group, select pipe flex table. It will show a flex table of the selected pipes in which you can see the "Attached Isolation Valve" column with the isolation valves assigned to those pipes.
See Also
Forum Thread
How to create a Selection Set
How to filter a FlexTable by Query, Selection Set, or by selecting from drawing pane for reporting, global edits, etc.