| Product(s): |
OpenFlows FLOOD |
| Version(s): |
10.02.01.01 |
|
Overview
This article will cover how to create a new workspace and model domain
Method
If you start working from scratch (without importing an existing workspace), you will always need to create a new workspace and model domain. The process is quite simple:
In the “project” tab, under the “Workspace” group, just click “New”:
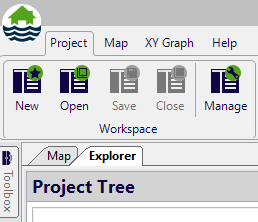
Figure 1 – Workspace group
After this you will see a new dialog menu where you should use the default selected option:
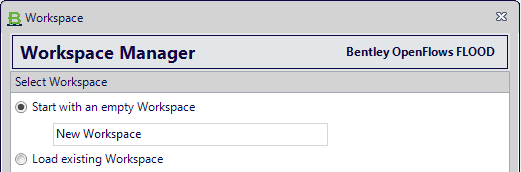
Figure 2 – Create empty Workspace
You can click ok. After that, the tab will change to “Explorer” and you will be able to see the Project Tree with the name of the Workspace selected (in our case, the default Workspace name was used – “New Workspace”):
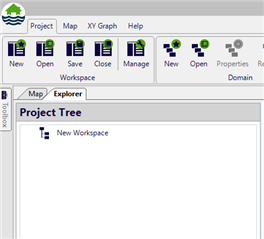
Figure 3 – Explorer tab / visualizing Project Tree from the New Workspace
After this, you need to create a new project. You can do this by using the button “New” in the “Domain” group from the “Project” tab, or alternatively, right-clicking in the Workspace recently created (inside (Project Tree”), and selecting the option “Insert Domain”.
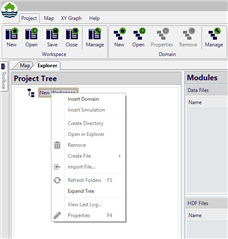
Figure 4 – Inserting New Domain
After this, you will find a new dialog window, where we have to select different parameters:
- For the Domain name, you can select what you want, or use the default “New Domain”;
- For the Root Directory, you can select the following directory (which needs to be empty):
-
- C:\OpenFlows FLOOD Quick Start Guide\Projects\New Domain
- For the Numerical Model, we have 3 options: MOHID Land, MOHID Water, or Urban Flood Simulator (which couples MOHID Land with EPA SWMM). Let’s select Urban Flood Simulator.
Leave all the other fields empty. You should see the Domain menu as follows:
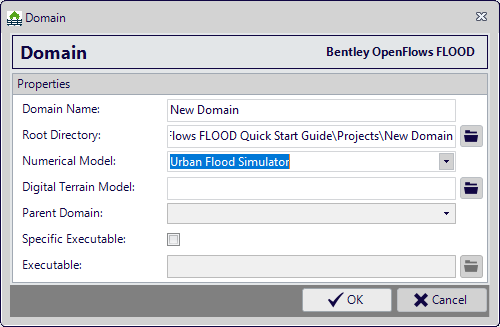
Figure 5 – Domain configuration menu
Press OK to close the window.
Now we have created the basic structure of the project (solution + domain). If you expand your Project Tree, Your Explorer tab should look like shown in the next figure.
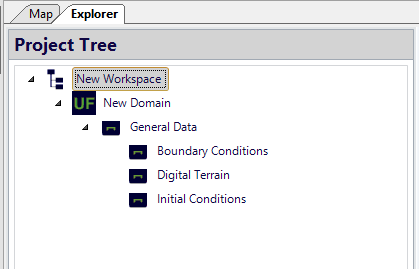
Figure 6 – Visualizing Project Tree from the New Workspace and New Domain