| Product(s): |
WaterGEMS, SewerGEMS |
| Version(s): |
CONNECT Edition Update 3 and later |
| Area: |
Modeling |
| Environment: |
ArcGIS Pro |
Problem
How to use the native ArcGIS Pro Snapping tool to add elements to WaterGEMS or SewerGEMS model in the ArcGIS Pro platform
Solution
In many cases, using the layout options found in the WaterGEMS-Layout tab or SewerGEMS-Layout tab in the ArcGIS Pro platform is sufficient to manually create elements in a model. However, one of the advantages for working in another platform is access to the native tools of that platform. This includes using the snapping tool to accurately create elements in a model. The example below uses WaterGEMS as an example, but the same workflow can be used in SewerGEMS for ArcGIS Pro.
First, make sure the snapping is set to On by going to the Edit tab, then selecting Snapping and setting the snapping to be on.

Next, click the Create button in the Edit tab, which will open a Create Feature tool.

This will include a list of the WaterGEMS element. When using this feature, you will need to elements from this Create Feature tool. First, add nodes to the model by selecting the node type you want to include. Once the nodes are in place select the pipe element to connect the junctions. Below shows junctions that have been added and the pipes being connect to them.
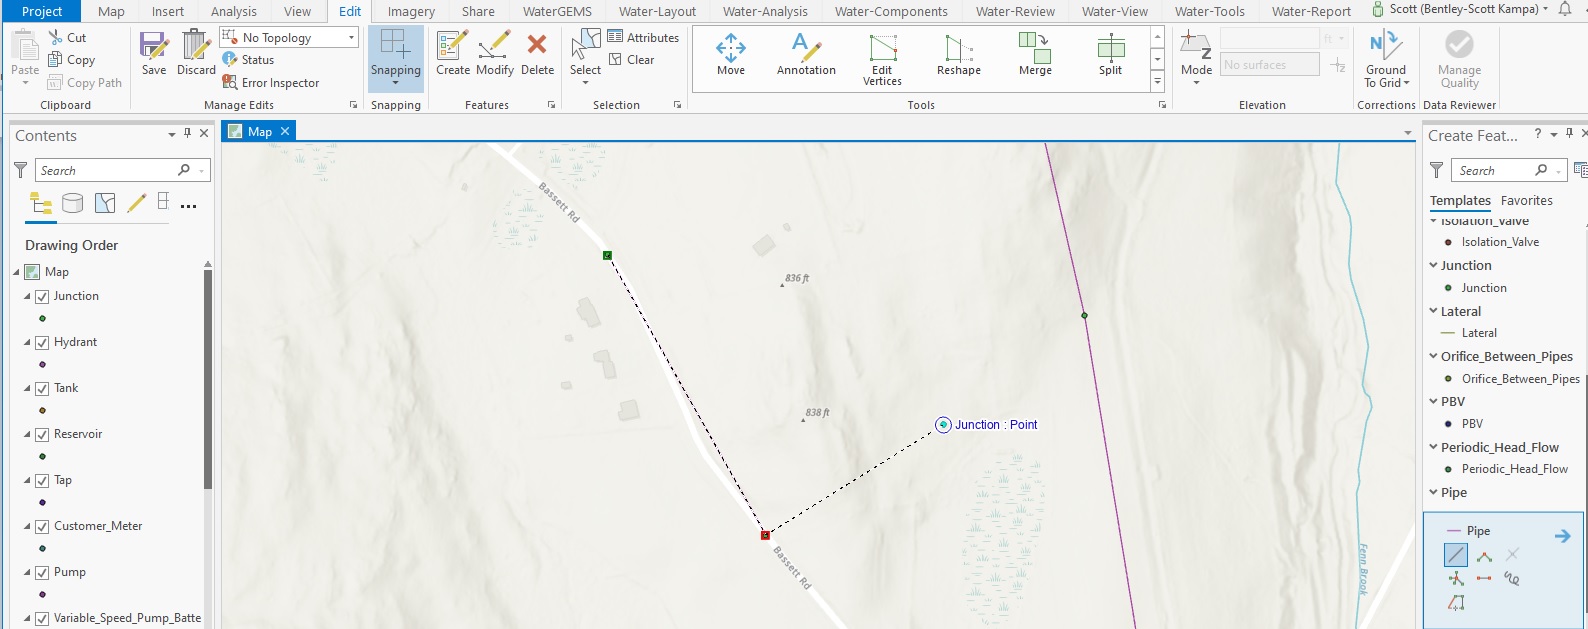
To assure that the pipe is connected the junctions, after connecting the pipe from one node to the next, right-click and choose Finish. The WaterGEMS model and the ArcGIS Pro .APRX file will be updated and the pipe will be included in the model.
See Also
WaterGEMS for ArcGIS Pro and WaterGEMS for ArcMap FAQs
SewerGEMS for ArcGIS Pro and SewerGEMS for ArcMap FAQs