| Product(s): |
WaterSight |
| Version(s): |
10.00. |
| Area: |
Documentation |
Overview
The goal of this page is to calculate the risk score and grade for each pipe by combining the likelihood of failure and consequence of failure previously calculated.
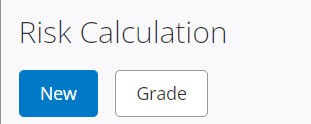
How to start
The very first time the user opens the Risk page, an empty page will be displayed. To start creating a new risk scenario click on the New button located on the top of the page.
After clicking New, the user will be redirected to the Risk Matrix page, in order to configure the risk calculation.
Thumbnail tiles
Whenever a risk scenario is created in the Risk Matrix page, it will get listed in the Risk Calculation page, and represented by a thumbnail tile.
It contains on the left a mini-map of the pipes color coded by the risk grade (default is green - low risk, yellow - medium risk, red - high risk). The user can change both Grade names and colors by clicking in the grade button on the top of the page. On the right side there is information about the name of the risk scenario as well as the length of pipes that fall into each risk grade category.
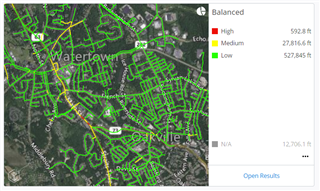
Open Results
Click Open Results to see risk results.
More Options
Clicking in the more button (...) located in the lower right corner will open a dialog with the following actions: see results, edit logic, delete and download CSV.
Clicking edit logic the user will be redirected to the risk matrix page where he will be able to check or update the risk calculation. Clicking delete will permanently delete the risk scenario created. Clicking donwload CSV will download a file with the complete calculations for each pipe: LOF grade, COF Grade, Risk Grade, LOF score, Risk score, pipe length.
Grade
Clicking on the "Grade" button located on the top of the page will open a pop-up dialog for the user to configure the risk grades.
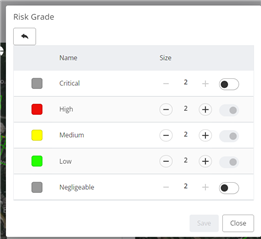
The user can configure:
- Grade names: default is Low, Medium and High,
- Grade colors: default is green, yellow and red,
- Pipe thickness for each grade: pipes will be color coded in the map according to the color and size defined here. Default thickness is 2.
- Two additional risk grades are toggled of (Critical and Negligible) but can be enabled and the user can also change both name and color
Once the configuration of the grades is done, automatically all risk scenarios that were previously created are updated accordingly with the new grade definitions.
See also
Likelihood of Failure
Consequence of Failure
Risk Matrix
Capital Planning
OpenFlows TechNotes and FAQ's