| Product(s): |
WaterGEMS HAMMER, WaterCAD
|
| Version(s): |
10.XX.XX.XX, 08.11.XX.XX |
| Area: |
Modeling |
Overview
This TechNote describes the process of importing demand patterns from an Excel spreadsheet into a model using ModelBuilder. A similar approach can be followed if the demand data is available in a shapefile format.
Create a Spreadsheet
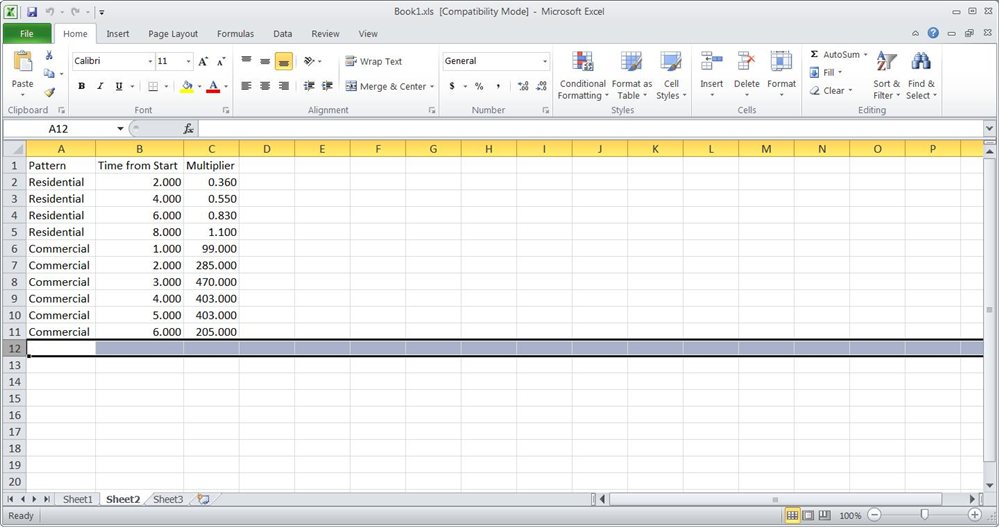
The first thing you would need to do if this isn't already done is create a spreadsheet. This spreadsheet will have two sheets. On the first sheet, the pattern names will be listed along with the start time, the starting multiplier and the pattern format.

On the second sheet, will be the pattern curves.
Using ModelBuilder to Import the Patterns
1. Go to Tools > ModelBuilder.
2. Select a Data Source type: (This would be the Excel spreadsheet that you have created.)
Make sure that both sheets are checked on the bottom left of the dialogue box. Click on Next.
In the ModelBuilder Summary you might see the message "# row(s) ignored due to missing key-field values". You can add a "Where" clause so that blank lines are ignored.
Turn on the check box for the "Where" clause and type Pattern <> '' (these are two apostrophe characters, not a double-quote symbol) in the "Where" field.

3. The next screen will have the spatial and connectivity options. Specify whether the coordinate unit in your data source is in feet or meters. Uncheck the box next to "Create nodes if none found at pipe endpoint". Click on Next.

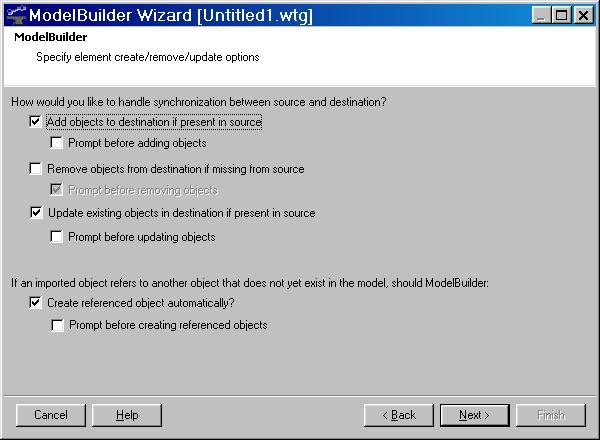
4. Check boxes as shown below. Click Next.
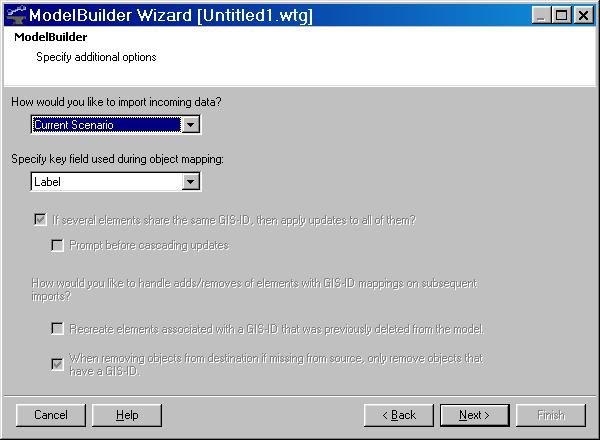
5. Check boxes as shown below. Click Next.
6. For the first sheet, click on the > Components > Pattern. For the key field select Pattern. In the Field Mappings section at the bottom of the dialog, click on the > for Property and select Pattern Summary.
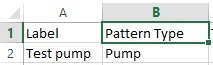
Note: By default, the pattern will be created as a hydraulic pattern. If you need to create a pump or valve pattern, you will also need Sheet 1 of the spreadsheet to list the cell for the pattern type. For instance, if you want to add a pump pattern, there should be a cell with the entry "Pump," similar to the screenshot below. If you wanted to add a reservoir pattern the entry in the Pattern Type field should be "Reservoir". If you do this for the pattern type field in the spreadsheet map it to the "Pattern Category Type (Label)" property. This will add the pattern as that type instead.
For the second sheet, click on the > Collections > Pattern Curve. For the key field, select Pattern. Map the fields.
Click on Next.

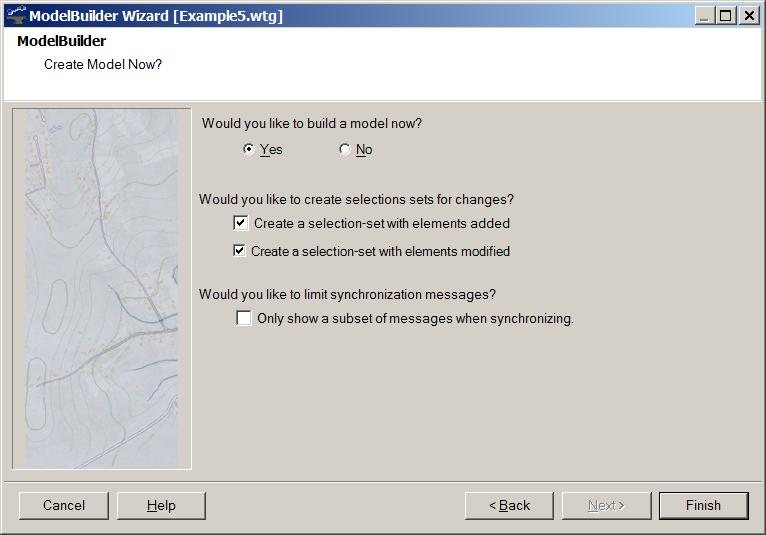
7. On the screen for creating a model, select Yes for "Would you like to build a model now?". Click on Finish.
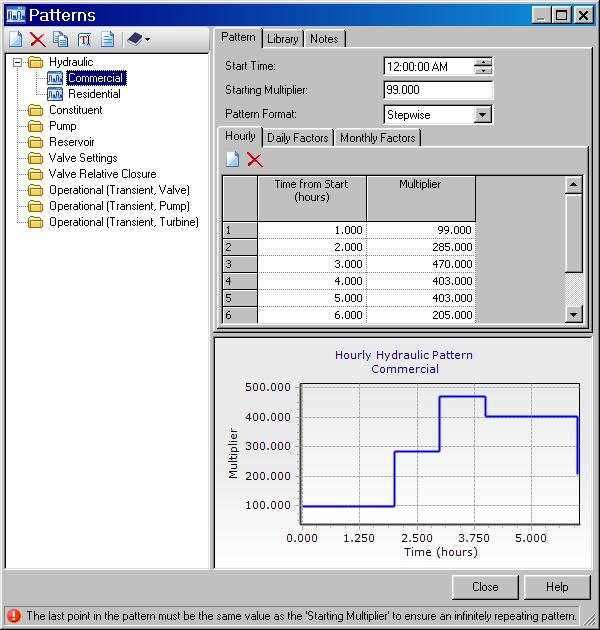
The patterns can be checked by going to Components > Patterns. The patterns you create will not look exactly as the screen shots below, however this is an example of the results of the import.

See Also
Product TechNotes and FAQs
OpenFlows Product Tech Notes And FAQs
General WaterGEMS V8 FAQ
External Links
Hydraulics and Hydrology Forum
Bentley LEARN Server