| Applies To | |||
| Product(s): | AutoPLANT Piping | ||
| Version(s): | All | ||
| Environment: | N/A | ||
| Area: | N/A | ||
| Subarea: | N/A | ||
| Original Author: | Bentley Technical Support Group |
Overview
This technote describes how to create a new SQL database and user in SQL Server 2005 for an AutoPLANT project.
The Steps
First off, you need to have Microsoft SQL Server 2005 installed and SQL Server Management Studio available to create databases.
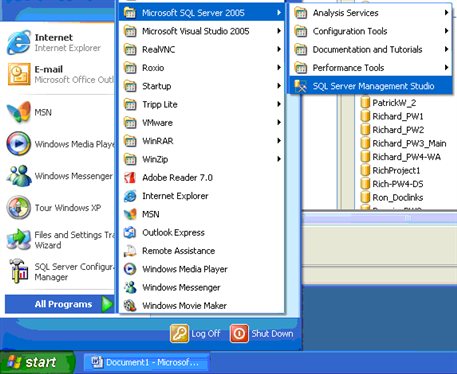
- Go to the desktop menu: Start > All Programs > Microsoft SQL Server 2005 > SQL Server Management Studio.
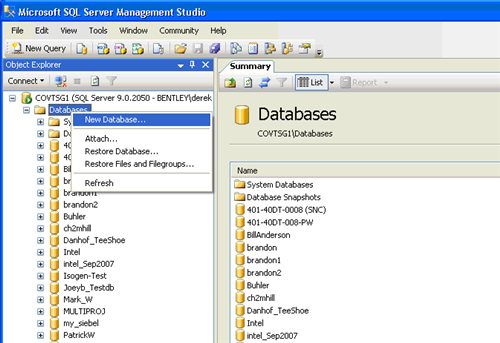
- Right click on the DATABASES node and pick NEW DATABASE
- Name the Database.
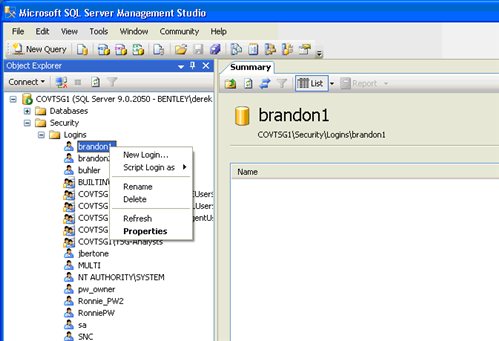
- Then create a new user by right clicking on "Logins".
- After creating the new user, go into the Login Properties. This dialog is available either when creating a new user or by right clicking on an existing user and going to "properties".
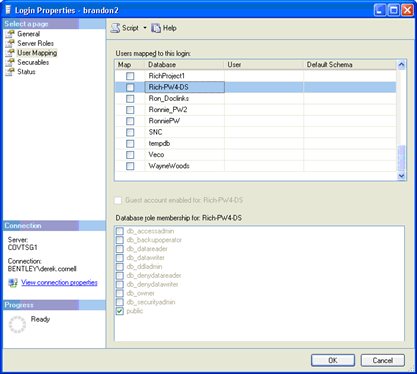
- In the Login Properties, go to "user mapping".
- Check the database that the user needs access to.
- Then check "db_owner" in the section "Database role membership"
- Select OK to exit the dialog.
You now have a new user and database in SQL Server 2005 for use with AutoPLANT.
Connect Screens for SQL Server
In order to connect to the new database, you must create a new AutoPLANT project through Project Administrator. This can be found at the desktop menu: Start > All Programs > Bentley > Plant XM > Project Tools > Project Administrator. When creating the project, the wizard will prompt you to select the database.

Do not check Multi Project Mode. We do not use this. We like to keep a separate database for each project. If multi project mode were to be selected, it would put all our projects in the database. This is a pain to trouble shoot or even send to other companies.
In the next screen, be sure to select "central project mode". This ensures that we store all information for that project in the database. Otherwise, local MS Access database will be created for each DWG in the project.

After selecting Next, you will be prompted to fill out project information. Upon completing that step, the project will be created. The last step in the project creation process is to connect to the database. The connect screen for SQL looks as follows, if the server name is OWL.
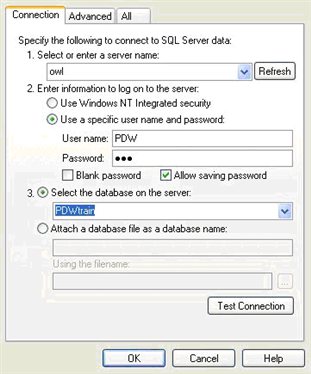
Don't forget the "Allow Saving Password" check. Once all the information is filled out, press the "Test Connection" button to confirm a proper link to the database.
See Also
External Links
Bentley Technical Support KnowledgeBase
Comments or Corrections?
Bentley's Technical Support Group requests that you please confine any comments you have on this Wiki entry to this "Comments or Corrections?" section. THANK YOU!